NOTE: this software is for Classic Mac OS (eg: OS 9) and cannot be used on Mac OS X.
Nisus Writer Classic is no longer for sale. This page is only for archival purposes.
We're lonely here in beautiful Solana Beach. Please come visit us. We know you have no idea what it's like, so we've prepared a brochure for you. It will appear in your physical mail box as soon as we can figure out how to print rather than save as asp. You can make your own brochure/flyer following these instructions.
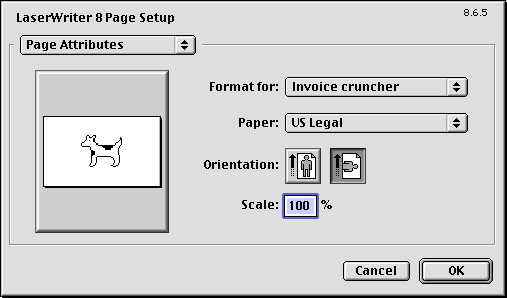
- Choose Page Setup... from the Print submenu of the File menu and change the Orientation to Landscape (for a four column brochure we're using US Legal paper). Click OK.
Choose Layout Page... from the File menu.
- Adjust the margins as desired.
- Choose Set Columns... from the Layout menu.
- Click 4 (columns) and click None (no line between columns).
- Set the gutter width. Click OK.
Note: for a balanced look, you should set the gutter width to twice the measurement of the margins. For example, if your margins are .5" you should set the gutter width to 1".- Choose Close from the File menu, to return to the document.
To see which column Nisus Writer displays on the screen, click the Display Info Bar button on the Vertical Button Bar. Nisus Writer indicates the column number in brackets after the page number in the center of the Info Bar.
The Info Bar displays the column number in brackets
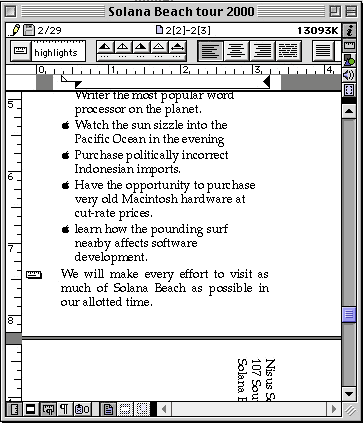
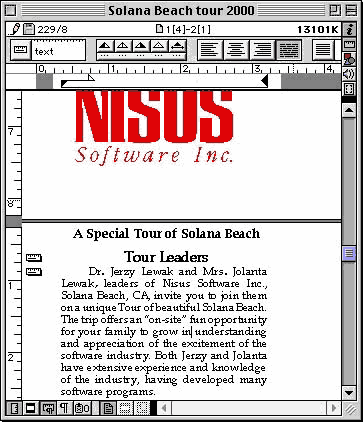
- Type the text of the inside panel of the flyer in the four columns on page 1.
The text automatically wraps from the bottom of one column to the top of the next. If necessary, choose Page Break from the Insert menu to end one column and enter text at the top of the next.- Type the text of the folds and back of the flyer in the columns on page 2.
On column 3 of page 2 create a text box on the Graphics Layer and enter the return address. Rotate this and place it in the approprate corner opposite where the stamp goes.
On column 4 of page 2 create a fancy Page as Graphic document to place and rotate. This can serve as the cover.
The fourth column is the front cover, the third column is the back cover (used for mailing information) and the first two columns are the inner flaps.
- Choose Print... from the File menu.
- Set it to print from Pages: 1 to 1 and clickPrint.
- Choose Print... from the File menu once again.
- Set it to print from Pages: 2 to 2.
- Change the Paper Source to Manual and click Print.
- After page 1 has printed, feed the blank side of page 1 into the printer to print page 2.
- Fold between columns (two folds) to create the flyer.
You can see the finished product (in the Layout Page window) here (inside and outside).
The non-existent Museum of Southern Califonia wanted a flyer to post on bulletin boards. The inside they printed in a fancy font in a large size. Then for the outside they wanted to have more catchy information so that when in came in the mail the sorter would not throw it away. They used the graphics layer of Nisus Writer and rotated a Placed Page Graphic (twice to turn it upside down) so that when folded the mailer would appear correct.
You can see the result (the outside) here.