NOTE: this software is for Classic Mac OS (eg: OS 9) and cannot be used on Mac OS X.
Nisus Writer Classic is no longer for sale. This page is only for archival purposes.
So, you have prepared your Nisus New File in such a way that you have the name of the document, which page of how many you are on, and the time and date variables all in the header so that when you print any document you know what you've got.

You've been typing your term paper (or The Great American Novel) into this New File and it was saved long ago, but now it is time to format it to turn it in to your professor (or publisher). There are special formatting requirements you need to follow and you don't want to bother Nisus Software technical support, after all, you may not be a rocket scientist (or maybe you are, or will soon be), but you ought to be able to put page numbers in the correct location of a page so that it prints our correctly.
For an example document, we'll use the first few (multilingual) chapters of the unknown work: "The Adventures of Don Diego de la Escribir" by the even more unknown (if not non-existent) Ben Hurmak.
Take a good look at your document. Right now you have one header (which appears on every page) and no footer. But you want to have all kinds of different headers and footers. You even want some pages to have lowercase Roman numerals on them and you want the entire numbering system to begin so that the first "1" or "i" appears after the first physical page of the document. In addition to this, the first page of each chapter needs the page number in the center at the bottom and succeeding pages must have the page number in the upper right hand corner. And, on top of all that, each blank even numbered page (at the end of chapters) should have no number on it at all.
We want to leave that header there. A time may come when we want to use it once again.
1. Open the Header/Footers window (click the Display Header/Footer Button at the bottom of the window or choose Headers/Footers from the Display submenu of the Tools menu or double-click the where you see the text of the Header).
By the way, if you forgot what all those buttons do, you can get a refresher course by pressing CONTROL and pointing to any one of them (this turns on Balloon Help momentarily). Or check this page which illustrates and explains each one.2. Select the text of the Header and choose White from the Color submenu of the Style menu.
We could have made the text invisible. However this would have made the header space itself contract to nearly nothing. As it is now, the header takes up the same amount of space, but the text is no longer visible.
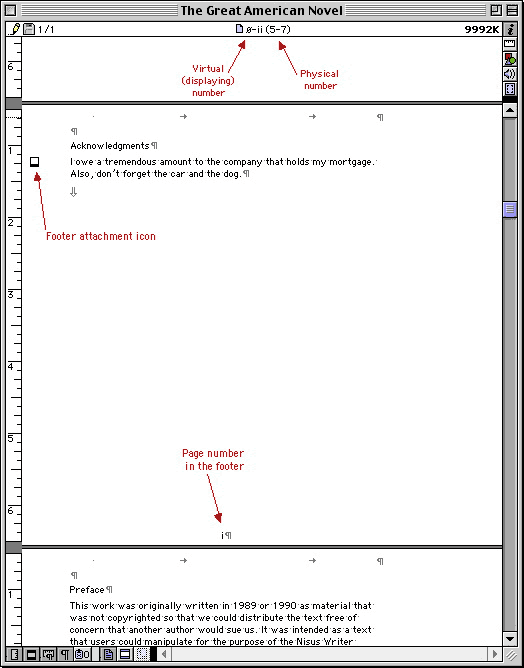
We have this one long document, but the title page(s), the copyright page, the dedication and (maybe even) the acknowledgments pages all appear before we begin numbering.
1. Put your insertion point after the first full paragraph on the page on which you want the numbers to appear and choose Footer from the Insert menu.
2. Make sure that the Center Justify button is selected and choose Page Number from the New Number submenu of the Insert menu.
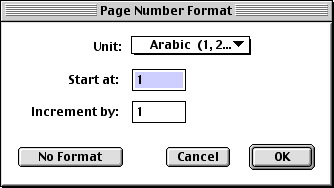
3. Double-click where you see the number (in the new Footer) and type the appropriate starting number in the dialog that appears. (Ben has 5 pages before he wants the numbers to start counting, so he uses "-4"). Choose the numbering display you want (in this case, Ben uses lowercase roman numerals without indicating how many pages there are in the novel - he doesn't want people to know how many pages are left).
4. Click Set and then click Done.
1. Put your insertion point where you what the change to begin.
2. Choose Format Page Break... from the Insert menu.
3. Enter the values you want. Here, Ben wants to go back to the standard Arabic numerals and resume numbering his masterpiece beginning on page 1. Then Click OK.
Notice how the document (and the Info Bar) display the new pagination information.
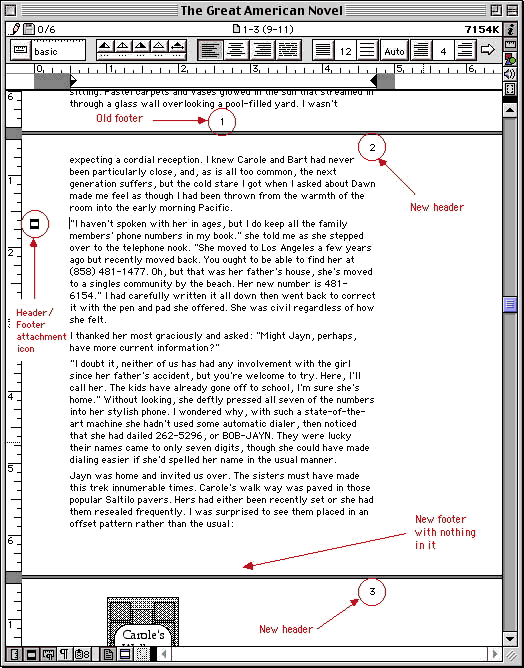
Ben now wants his numbers to appear in the upper right corners of every page instead of down there, centered at the bottom.
1. Put your insertion point in the first full paragraph of the page on which you want the numbers to appear in the right corner.
2. Choose Footer from the Insert menu.
3. Close the Headers/Footers window.
Notice how the page numbers no longer appear at the bottom. You've added a footer with no information. This footer overrides the display of the footer that was there.
4. Choose Header from the Insert menu.
5. Click the Right Justify button on the Text Bar.
6. Choose Page Number from the New Number submenu of the Insert menu.
7. Close the Headers/Footers window.
Notice how the page numbers now appear in the upper right corner. You've added a footer with this information. This header overrides the display of the original header (that we made White).
You will want to "undo" this at the beginning of each chapter. By now, you know what to do....
1. Put your insertion point after the first full paragraph on the page on which you want the numbers to appear (somewhere there where the chapter begins) and choose Footer from the Insert menu.
2. Make sure that the Center Justify button is selected and choose Page Number from the New Number submenu of the Insert menu.
3. Close the Headers/Footers window.
4. Choose Header from the Insert menu
5. Make sure that the Right Justify button is selected and choose Page Number from the New Number submenu of the Insert menu.
6. Close the Headers/Footers window.
Then repeat this process for each chapter.
So far so good. However, one of Ben's chapters ends on an odd numbered page. He doesn't want the next chapter to begin on the even page, but, neither does he want a page number to appear on a blank page.
1. Put your insertion point at the end of the text at the end of the chapter.
2. Choose Page Break from the Insert menu.
3. Type a Return.
4. Choose Header from the Insert menu.
5. Close the Headers/Footers window.
Once again this blank header (like the footer we put in before) overrides the display of the footer that was there.
When the next chapter begins Ben repeats the process as described above.
Please support your starving author. Ben hopes you'll run out (or click over) to your local (or favorite) purveyor of texts and purchase his magnum opus (created entirely in Nisus Writer of course).