Introduced at the beginning of the section: “Format Text” on page 101, the Formatting Examiner can help you diagnose a variety of formatting issues you might encounter.
Understand and Modify the Appearance of Your Document
When we speak, our words (our texts) are formatted, “clothed”, in timbre (harsh/soft), volume (loud/quiet), velocity (fast/slow) and pitch (high/low). When we write, we clothe our words visually using fonts, sizes, cases, and various other attributes: bold, italic, color, line wraps and indents, and more. Current word processors enable us to collect these various formatting attributes into “Styles”. At times our texts can display in such a wide variety of formatting (especially if we copy and paste portions of texts between documents and collect texts from the Web) that we need help sorting everything out. For many years, the venerable WordPerfect touted its Reveal Codes. Rather than force users to examine arcane codes, Nisus Writer Pro enables you to examine each individual character and larger blocks of text in your document using the Formatting Examiner palette.
The Formatting Examiner Interface
The Formatting Examiner displays two primary types of information: Applied Formatting and Displayed Formatting.
☞ To explore the use of the Formatting Examiner further, the “Sample Chicago Style Paper” file is used to experiment and illustrate.
Figure 424
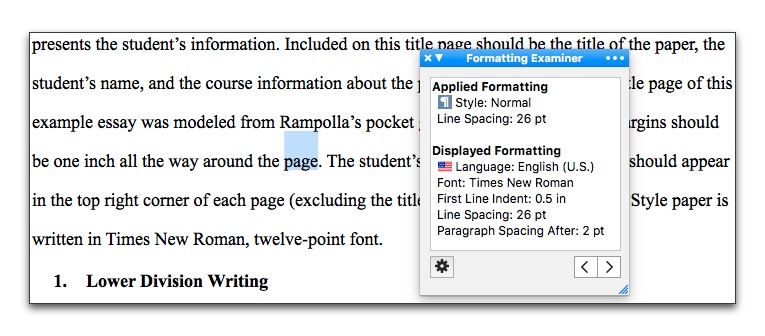
A document with “Normal” text, modified, selected
As explained in the section: “Style Sheets” beginning on page 136, the Nisus New File that comes with Nisus Writer Pro has built into it a number of useful styles. When you apply these styles to your text these style’s names appear in the Applied Formatting portion of the Formatting Examiner. In addition it indicates all formatting you apply directly such as font changes, ruler adjustments, and more, as illustrated in Figure 424, where Line Spacing is set to 26 points (which is different from the line spacing enforced by the Normal style).
The second portion of the Formatting Examiner shows the various attributes that make up the Applied Formatting (and more), that is the underlying formatting that is used to display your text when you apply any particular style. For example, if a Heading 1 style is applied to some text, it enforces a larger font size for that text. Thus this area shows all the formatting enforced by the applied styles (and more).
Other adjustments may also be at work for the Displayed Formatting portion of the Formatting Examiner. First off there’s the obvious: manually applied formatting (aside from styles) such as the Line Spacing set to 26 points in Figure 424. But there are other possibilities like font substitution (explained on page 108), that is, if the applied or enforced font cannot display the text and another backup font is chosen.
Additional Tools and Displays in the Formatting Examiner
The Formatting Examiner offers a variety of tools for working with the formatting of your document.
• Right/next and left/previous buttons in the lower right corner of the Formatting Examiner are explained in the section: “Find the next/previous bit of text with specific formatting” on page 494.
• A Gear menu in the lower left corner of the Formatting Examiner contains the menu commands:
◦ Remove Selected Formatting
Removes any formatting selected in the Formatting Examiner palette’s list. It will not be enabled if any Display Formatting is selected.
◦ Remove Formatting Except Styles
Removes all formatting, except “language” from selected text except for applied Styles.
◦ Remove Formatting and Styles
Removes all formatting (both character and paragraph, but not “List” styles and not language) from selected text and applies the “Normal” style to the selection.
• The Gear menu also includes commands to search for formatting:
◦ Find All in New Window
Opens a new window as explained in the section: “Display all matches in a new window, including their context” on page 462.
◦ Select All
Selects all the text in the document that shares the attribute designated in the Formatting Examiner.
◦ Select Next
Selects the next string of text in the document that shares the attribute designated in the Formatting Examiner.
◦ Select Previous
Selects the preceding string of text in the document that shares the attribute designated in the Formatting Examiner.
When you select special kinds of objects in your document, the Formatting Examiner identifies them as well.
Interpreting the Formatting Examiner
The following twelve screenshots illustrate many of the kinds of information that the Formatting Examiner displays.
• Selecting text with a variety of attributes causes the Formatting Examiner to list them all and display them with the shading of mixed selection, as illustrated in Figure 428 on page 489,
• List Item, as illustrated in Figure 425 on page 487
• Bookmarked text, as illustrated in Figure 426 on page 488,
• Cross-reference text, as illustrated in Figure 427 on page 488,
• Footnotes and/or Endnotes, as illustrated in Figure 428 on page 489,
• Hyperlinks, as illustrated in Figure 428 on page 489,
• Indexed text as illustrated in Figure 429 on page 489 and Figure 430 on page 490, as well as text marked for the table of contents,
• Images, as illustrated in Figure 431 on page 490,
• Shapes, as illustrated in Figure 432 on page 491,
• Text Boxes, as illustrated in Figure 433 on page 492,
• Formatted text overlaying shapes and images, as illustrated in Figure 434 on page 493,
• Information Stamps (items inserted in your text using the commands of the Insert > Date and Time and the Document Property submenus) as illustrated in Figure 435 on page 493.

Figure 425
A List Item selected and analyzed in the Formatting Examiner
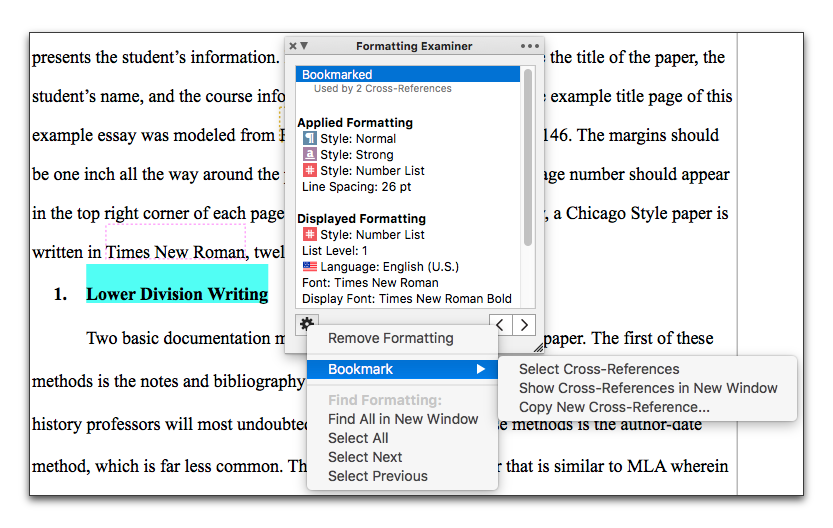
Figure 426
Bookmarked text selected and analyzed in the Formatting Examiner

Figure 427
Cross-referenced text selected and analyzed in the Formatting Examiner
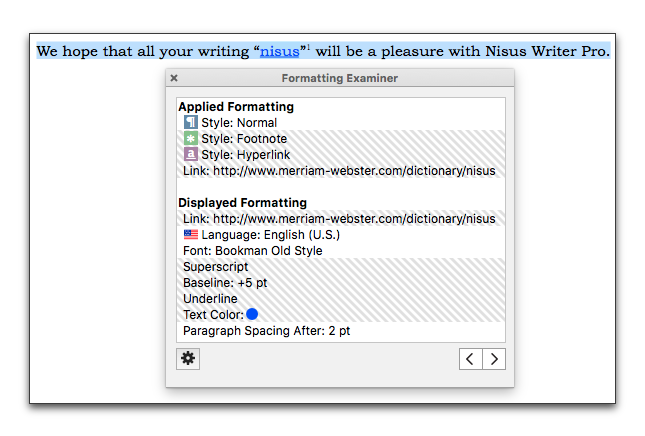
Figure 428
Text with a hyperlink and footnote selected and analyzed in the Formatting Examiner
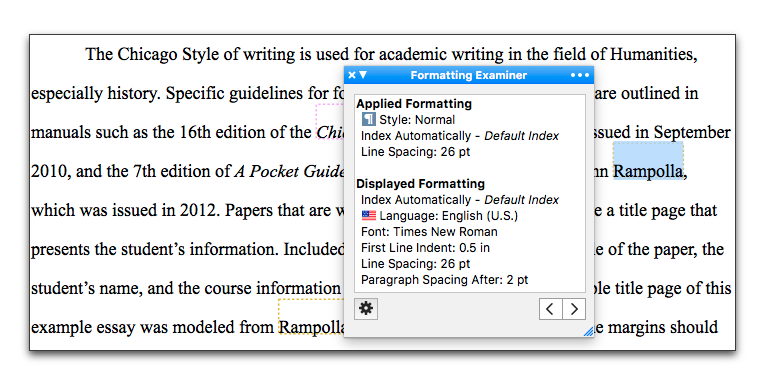
Figure 429
Text indexed, selected and analyzed in the Formatting Examiner
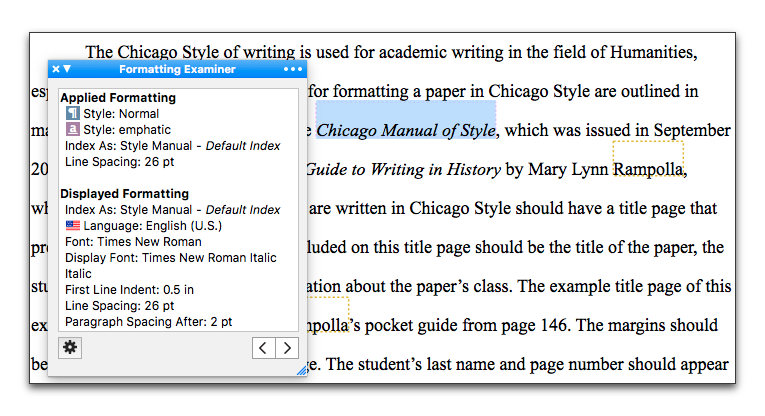
Figure 430
Text indexed using Index As selected and analyzed in the Formatting Examiner
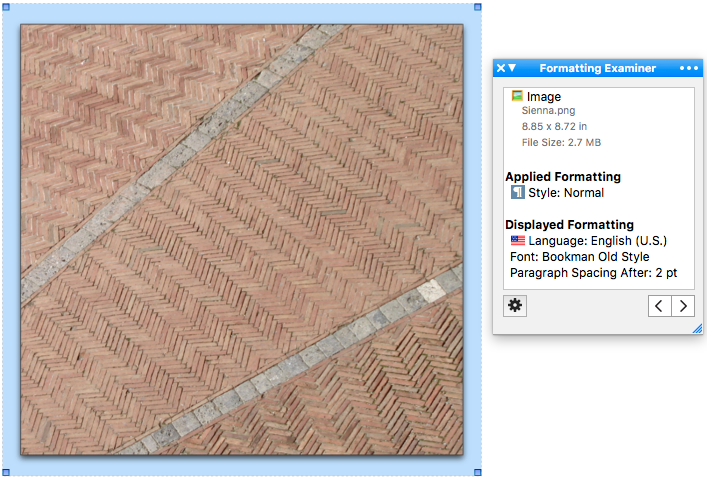
Figure 431
An image selected and analyzed in the Formatting Examiner
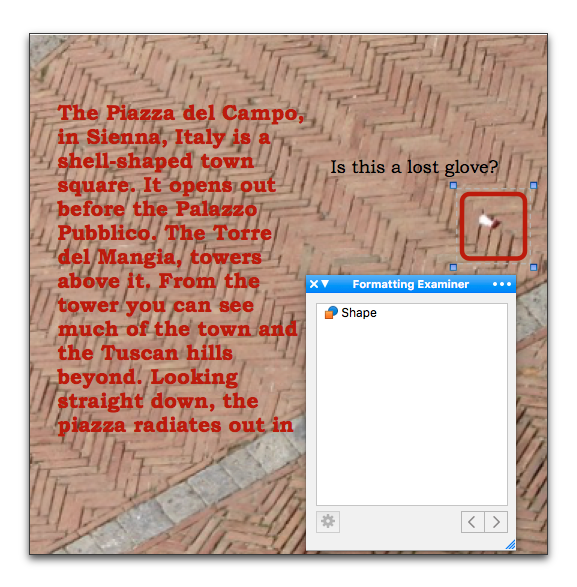
Figure 432
A shape (red rounded rectangle) selected and analyzed in the Formatting Examiner
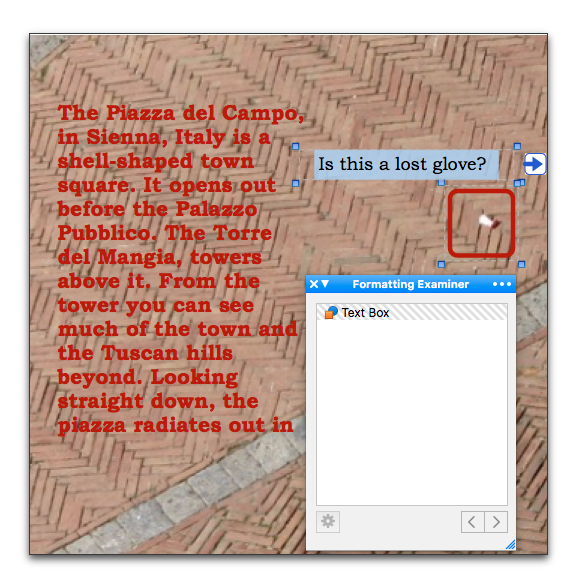
Figure 433
An image and a Text Box selected and analyzed in the Formatting Examiner
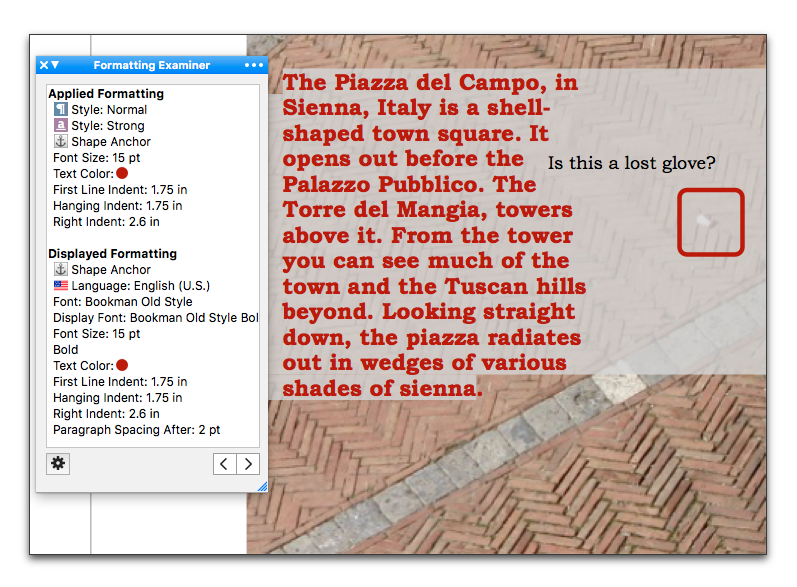
Figure 434
Text overlaying a cluster of images (text box and shape) selected and analyzed in the Formatting Examiner
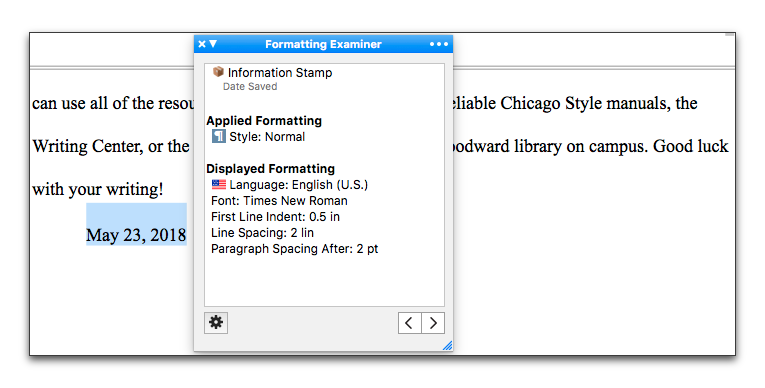
Figure 435
An “Information Stamp” selected and analyzed in the Formatting Examiner
Uses for the Formatting Examiner
As you examine your document with the Formatting Examiner you may notice undesired attributes listed either in the Applied Formatting or Displayed Formatting portion of the Formatting Examiner. There are a variety of tasks you can accomplish with that information.
Find the next/previous bit of text with specific formatting
Let’s say, for example, that you’ve marked various portions of your document using a highlight color with the intention of returning to them for further elucidation.
1. Select the designated attribute.
2. Click the right/next or left/previous pointing button in the lower right corner of the Formatting Examiner.
3. Either:
▷ Press ⌫ to remove that attribute from the selected text, or
▷ Click the Gear menu and choose the menu command Remove Formatting.
☞ Note, however, that if, when you finish your editing you remove the selected attribute the next/previous buttons will select text with different formatting.
• If you select a footnote or endnote reference, or similar object you can use the right/next or left/previous buttons to circulate through your document examining each one in turn.
• You can select indexed text and see how it is indexed (using the command Tools > Index > Index, or Tools > Index > Index As…). If you used Index As… the Formatting Examiner displays the term(s) that appear in the index. You can use the right/next or left/previous buttons to circulate through your document examining each time that text is indexed.
☞ If you remove all Applied Formatting from selected text the Formatting Examiner will indicate “None”. Displayed Formatting will always indicate a Language, a Font and a Font Size.
Find all text with specific formatting
Perhaps you have copied text from other documents repeatedly and pasted that text into a new, larger, document. When you pasted the text you included the original formatting and now you want to find all those snippets and edit that text or remove the offending formatting.
1. Select the designated attribute.
2. Click the Gear menu and choose the menu command Find All in New Window.
This opens a new window as explained in the section: “Display all matches in a new window, including their context” on page 462.
3. Review the list and click the line containing the text you want to review.
This selects that text in the document. You can minimize the new Find & Replace window and edit the selected text and/or remove the found formatting.
☞ You can repeat this process for each line of text listed in the Find & Replace window.
Use the Formatting Examiner with bookmarked text
If you select bookmarked text, as illustrated in Figure 426 on page 488, the Formatting Examiner offers an additional Bookmark submenu with the commands:
• Select Cross-References
This selects all the cross-references in the document that refer to the selected bookmark.
• Show Cross-References in New Window
This opens a new window as explained in the section: “Display all matches in a new window, including their context” on page 462 that lists all the cross-references that refer to the selected bookmark.
• Copy New Cross-Reference…
This is explained in the section: “Copy a new cross-reference”.
Formatting Examiner Exceptions
When you select large amounts of text or numerous multipart selections, for performance reasons, Nisus Writer Pro does not always inspect all text in the selection. When Nisus Writer Pro encounters these large selections Nisus Writer Pro will look through as many chunks as it can, bounded by processing time.
When is the command Remove Formatting enabled?
You may select text in your document, check it with the Formatting Examiner and want to remove certain attributes only to see that the command in the Gear menu: Remove Formatting is disabled. The command is enabled when both:
• One or more removable “Applied Formatting” rows are selected.
Some items are not removable via this action, such as section breaks, merge placeholder, etc.
• No “Displayed Formatting” items are selected.
Because display formatting is generated or enforced by some underlying reasons, you cannot remove it directly. (You need to determine the cause of the formatting and remove that instead.)
| Previous Chapter PowerFind Pro |
<< index >> |
Next Chapter Use Comments |