Use the Page Borders palette to put a line around the edge of your page
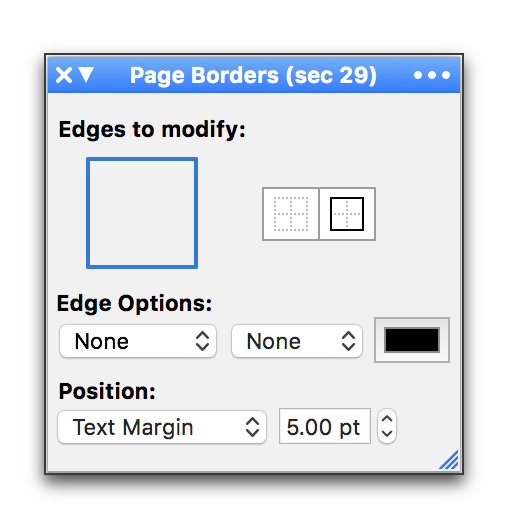
The Page Borders palette illustrated in Figure 161 below functions essentially the same as the Paragraph Borders palette discussed in “Draw a border around paragraphs” beginning on page 435, except that it has one fewer edge it can modify (between paragraphs, there is no control for between pages) and controls the borders of the entire page.
The tools of the Page Borders palette are enabled whether you are in Draft View or Page View, but you will not see the results of your choices unless you are in Page View.
Determine which edges of the page should have lines
The large square on the left of the palette beneath Edges to modify enables you to select individual edges to modify.
► Click any blue line to turn off that edge.
The two small squares to the right turn on or off all edges.
► Click the empty square on the left to turn off all edges.
► Click the box in the square on the right to turn on all edges.
Figure 161
The Page Borders palette
Determine the pattern, width and color of the line of the page’s border
The pop-up menus and color swatch beneath Edge Options enable you to select the patterns, width and color of the page border lines. Each edge can have its own setting of pattern width and color.
► The pop-up menu on the left offers the same line patterns as with leader tabs, illustrated in Figure 121 on page 134.
► The pop-up menu to its right enables you to set the thickness of the lines. You can choose between None, Hairline, ½ pt (point), ¾ pt , 1 pt, 1½ pt, 2 pt, and increasing at 1 pt increments up to 8 pt thick lines.
► The color swatch on the right opens the macOS Colors Panel which is explained in the section: “Use the MacOS Colors panel” beginning on page 438.
Determine around which portion of the page’s perimeter the border appears
The Position pop-up menu enables you to choose what part of the page should be framed by the border. The settings in this pop-up menu affect all edges.
► Choose…
• Page Edge as illustrated in Figure 162
• Text Margin as illustrated in Figure 163
• Header Margin as illustrated in Figure 164
Set the distance from the edge or margin the border should appear
In addition, you can set the distance the border appears from the edge or margin chosen by clicking the stepper at the bottom of the palette or entering the number of points you want directly into the text edit field available. The settings in this field affect all edges.
☞ Press ⌘ when you click a palette stepper’s up or down arrow to apply the shown value uniformly to all selected text, instead of adjusting all selected values independently.
☞ The borders only appear in Page View.
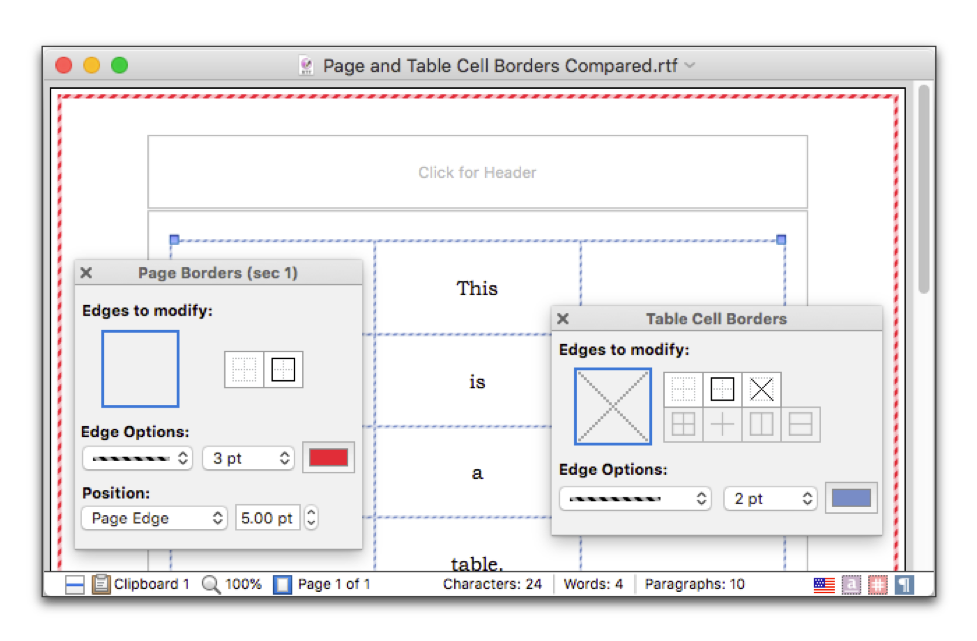
Figure 162
Page Border set at Page Edge

Figure 163
Page Border set at Text Margin

Figure 164
Page Border set at Header Margin
| Previous Chapter Set the Number of Columns |
<< index >> |
Next Chapter Headers and Footers |