
Nisus Writer Pro has a wide variety of options that affect the display of your working environment. Some of these have been described elsewhere in the documentation, but the majority are controlled by the Appearance Preferences window as described below.
Appearance preferences are applied immediately and affect all document window.
Figure 493 The top of the Appearance Preferences window
These options control whether Nisus Writer operates in Light Mode or Dark Mode. The option Use System Appearance will have Nisus Writer mirror whatever mode is set in your System Appearance Preferences, including automatically switching between Light Mode and Dark Mode based on the time of day.
For more details see the section Dark Mode.
Text editing areas always use Light Mode
This option forces text editing areas to always use Light Mode, even when the rest of the app (windows, toolbars, etc) is in Dark Mode.
The following appearance options relate to text editing.

Figure 494 Text editing options in the Appearance Preferences window
Insertion point (caret) blinks on/off
Toggles whether the text Insertion Point blinks on screen. Checkmark this option to enable blinking, where the caret periodically switches on and off. Disable this option if the blinking caret is a visual distraction and you want it to remain solid.
You can enlarge the width of the text Insertion Point if you have a hard time seeing it. Available caret widths options include:
◦ Hairline
This is the default system insertion point width.
◦ Character Width
The insertion point width changes based on its location in the text, and assumes the width of adjacent characters.
Focus mode fades inactive text by
As explained in the section “Focus on Your Writing”, Nisus Writer Pro has tools to help you focus on only the text you’re editing. This option controls how much inactive text should fade away:
► Dragging the slider to the right causes inactive text to be dimmer (more faded).
Fade inactive document split views by
As explained in the section Splits, you can divide your document into may splits to view different portions of your document simultaneously. This option controls how much inactive split views should fade away:
► Dragging the slider to the right causes inactive splits to be dimmer (more faded).
This section of the appearance preferences collects together a handful of display options for miscellaneous tools.

Figure 495 Tool options in the Appearance Preferences window
Enabling this option shows font previews in various font menus. Each font’s name will appear in that font, aka WYSIWYG. You will see these previews in the main font menu Format > Font, as well as in The Character palette.
☞ Font previews will cause Nisus Writer Pro to load all fonts available on your Mac in the background each time you first launch the app. This can expose problems or trigger delays if any installed fonts have preexisting issues. You can use your Mac’s Font Book application to validate your fonts and check for problems.
Additionally you can choose how large these font previews appear from among the following options:
Not all fonts are able to display their names as you might expect, especially Symbol fonts and non-Roman fonts.
This option allows you to customize the font used by the Navigator sidebar. To do so:
1. Click the button showing the current font (eg: Lucida Grande in Figure 495 above).
2. When The Fonts panel opens, choose whatever font and size you want.
The Navigator redisplays using the new font options immediately.
3. When you are satisfied with your choice, close the Fonts panel.
You can also choose the colors used by the Navigator sidebar, as explained in the section that describes the Navigator background color.
The Navigator sidebar is explained in greater detail in the section Navigator.
Automatically named bookmark suffix
As explained in the section Add a Bookmark, automatically and explicitly named bookmarks have subtle differences in their behavior. Here you can choose the suffix that appears for automatically named bookmarks so you can easily distinguish them as they are presented by Nisus Writer Pro.
Each of us responds to different color in our own unique ways. Nisus Writer Pro allows you to customize many of the colors you see in the application.
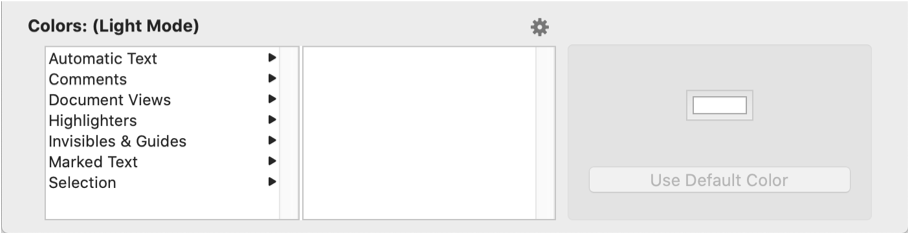
Figure 496 Color options at the bottom of the Appearance Preferences window
Multiple sets of customizable colors are grouped by category (eg: Automatic Text, Comments, etc). The various categories include colors that are part of your working environment and the user interface (GUI), like the Page View background color, but also colors used to highlight specially marked text in your documents, like misspelled words.
For specifics on all the available colors and their purpose, see the section List of customizable colors below.
Dark Mode colors vs Light Mode colors
All customizable colors can be separately configured for each appearance mode. In other words, you can have distinct colors for Light Mode and Dark Mode.
► To customize the colors for a particular appearance mode make it the active mode using the Appearance option at the top of this preference window. You will see the active mode name shown next to the Colors label.
1. Select a color category from the list on the left side, eg: Marked Text.
2. Select a particular color from within the category, eg: Font missing.
3. From the settings on the right side, click the color swatch (the beveled color rectangle).
4. The Colors panel will appear; choose a new color from the Colors panel.
Any color changes will be reflected on screen immediately.
5. Once you have chosen the desired color, close the Colors panel.
Certain customizable colors can be hidden completely. These colors usually highlight certain kinds of special text in your document. For example, automatic list items, bookmarked text, or generated indexes. You may not want to see such coloring as you’re editing document text.
To change whether such a customizable color is shown or hidden:
1. Select the desired color, as described in Change a particular color above.
2. From the settings on the right side, checkmark the option Hide this highlighting.
If you keep such highlighting visible rest assured that it will never appear during final output, eg: in printouts, PDFs, etc. This highlighting only appears on-screen to help you identify special content.
Nisus Writer lets you import and export your set of customized colors. This allows you to maintain and switch between multiple sets of customized colors, or share them with others.
► Click the gear button that sits above the list of customizable colors and choose the contextual menu Save Colors or Load Colors to export or import a “colors” file.
Each “colors” file stores all available customizable colors, in all color categories, for both Light Mode and Dark Mode.
You can restore the default colors that come with Nisus Writer Pro, in case you import or otherwise configure undesirable or confusing colors.
⚠️ Before you reset your colors you may wish to export your current color set, in case you do not like the default colors.
To reset all customizable colors:
► Click the gear button that sits above the list of customizable colors and choose the contextual menu Reset Colors. You will be warned that this operation is not undoable; confirm to continue.
The following sections describe the details of all customizable colors. The colors are listed by the categories in which they appear in the preferences.
Automatic text consists of those bits of text that Nisus Writer Pro stores as “variables” and updates, either automatically or on command
• Automatic numbers
such as those items inserted from the menu Insert > Automatic Number
• Automatic text
such as those items inserted from the menu Insert > Date and Time that update automatically (i.e. not Fixed…) as well as anything inserted using the menu Insert > Document Property.
• Cross-reference
any of the cross-reference you have inserted in the document using the menu command: Insert > Cross-reference…
• Indexes
any of the indexes you have inserted in the document using the menu command: Insert > Index > Insert Index…
• List items
any bullets, numbers or other text that appear when you insert a list in your document using the List button or the menu Format > Lists
• Merge Placeholders
any symbols that appear when you insert a merge placeholder in your document using any one of the commands from the menu Insert > Merge Placeholder
• Note references
any symbols that appear when you insert a footnote or an endnote in your document using Footnote or Endnote from the Insert menu; this does not affect the corresponding character in the notes area of your document
• PowerFind Bubbles
any metacharacter symbols PowerFind displays using natural language words and phrases in a “bubble” as explained in “PowerFind terminology”.
• Stale automatic text
because Nisus Writer Pro does not continuously update page and other cross-references as well as other automatic content such as character count and word count, this information can become “stale” to indicate that it is not fresh, Nisus Writer Pro draws a box around this text.
• Tables of content
any of the tables of contents you have inserted in the document using the menu command: Insert > Table of Contents > Insert TOC
The following colors appear on screen to indicate comment text and the text to which those comments are attached. These colors may also appear in printouts and PDFs if you choose to Print comments & tracked changes.
Nisus Writer Pro allows an unlimited number of commentators. However, the application only provides customizable colors for the first 6 other authors in every document.
• Author #1 Comments - Author #6 Comments
the color of comments made by others authors in the document.
• My Comments
the color of comments made by the current author– that’s you!
• Sidebar Background
the color of the Comments sidebar.
In addition, choose the menu command: Tools > Comments > Comment Display Options… to set how much information appears in the title bar of the comments and other options on a document by document basis. These features are explained in “Additional controls for the display of comments”.
• Draft background
the color of the background when in Draft View
• Draft text
the color of the text when working in Draft View
• Full screen background
the color of the background when working in Full Screen View.
• Full screen caret
the color of the Insertion Point when working in Full Screen View.
• Full screen gutter
the color of the area around the text editing area when working in Full Screen View.
• Full screen text
the color of text when in Full Screen View.
• Navigator background
the color of the background area of the Navigator
• Navigator text
the color of the text of the Navigator
• Page backdrop
the color of the non-“paper” region when in Page View
• Page color
the color of the “paper” region when in Page View (this does not print, neither to paper nor PDF)
• Page frame
the color of the line that separates the page from the page backdrop in Page View.
• Page View text
the color of the text when working in Page View.
• Palette mixed selection
the color of the pattern that displays in the background of fields when text with more than one type of formatting is selected.
Nisus Writer Pro comes shipped with a highlighter tool on the Toolbar that match the most common colors of highlighter pens available commercially. You can, however, change these six highlighter colors to anything you wish. The Highlight tool is explained in “Highlight text” and illustrated in Figure 119. It is contrasted with Background Color as explained in “How highlight color and background color differ”.
• Highlight Color #1 - Highlight Color #6
each numbered color matches the one as it appears in the sequence on the Highlight menu.
Nisus Writer Pro offers a number of guides you can turn on or off to help you:
• Invisibles
as explained in “Invisibles”.
• Page guides
as explained in “Page guide”.
• Shape anchor
as explained in “The Shape Anchor”.
• Shape bounding box
as explained in “The Shape Bounding Box”.
• Shape paste spot
as explained in “The Shape Paste Spot”.
• Table guides
as explained in “Determine the thickness of the lines”.
The following color preferences allow you to control how specially marked text is highlighted in your documents while editing. You can choose to hide these colors as described in “Show or hide colors”.
☞ If you enable the following highlighting options rest assured that it will never appear during final output, eg: when printing, exporting PDFs, etc. This highlighting only appears on-screen to help you identify special content.
• Bookmarked
any text to which you have added a bookmark using Add Bookmark As… from the Bookmark submenu of the Insert menu
• Bookmarked (autoname)
any text to which you have added a bookmark using Add Bookmark from the Bookmark submenu of the Insert menu
• Field code
any text from a document imported from Microsoft Word that uses features not implemented in Nisus Writer Pro, if these features happen to be saved in RTF via field codes (for example, a "BarCode" field code that inserts a scannable image of a postal address)
• Font missing
If you receive a file that contains fonts that are not available on your Mac, Nisus Writer Pro preserves them when you open, edit, and re-save the file. These fonts names appear in the font menu and character palette using a unique highlighting color. Though Nisus Writer Pro is shipped with this feature (the highlight color) turned off, it can also use this color to highlight text in the document that uses a missing font.
• Font substituted
as explained in “Font substitution”.
• Hyperlink
this coloring is shown on screen for any linked text in your documents.
• Include in index
any text you have added to an index using the menu command: Tools > Index > Index As… (this only displays the current or active index, the one checked at the bottom of Index submenu)
• Include in index (auto)
any text you have added to an index using the menu command: Tools > Index > Index (this only displays the current or active index, the one checked at the bottom of Index submenu)
• Include in TOC
any text you have added to a table of contents using one of the levels of table of contents from the menu Tools > Table of Contents > Include in TOC (this only displays the current or active table of contents, the one checked at the bottom of Table of Contents submenu)
• Misspelled
With Check Spelling as You Type turned on, Nisus Writer Pro indicates misspelled words with a dotted red line. You can change the color of that line.
Nisus Writer Pro can help you distinguish between various kinds of selections in your document:
• Active Selection
the color of the highlight of your text when you select it by double-clicking or dragging the pointer; the default is the color you set in your System Preferences (Appearance)
• Find & replace
the color of the highlight of your text when you select it by using the Find & Replace tools of Nisus Writer Pro
• Flash QuickFix
the color of the highlight of your text when you expand an abbreviation using QuickFix
• Flash Selection
the color of the highlight of your text when you choose Flash Selection, Previous Selection, or Next Selection from the menu Edit > Select, or press ⌤
• Inactive selection
the color of the Active Selection highlight of your text when it is in a background window; the default is the color set by Apple
• Rectangular selection
the color of the selection highlight of your text when you select it using Rectangular selection as explained in “Select a column of text”.
• Selection caret
The color of the Insertion Point.
• Spellcheck
the color of the highlight of your text when you select it by using the Spelling Checker tools of Nisus Writer Pro
• Table selection
the color used to highlight selected table cells when in table selection mode. This color is only used when table cells are fully selected; it is not used when text inside a table cell is selected.
Normally when you use a Mac you will see dark text on a light background– usually black text on a white background. This default appearance mode is called Light Mode; it applies to document text editing areas and to user interface (GUI) controls like buttons and labels, though for the latter the background color will often be a shade of light grey.
Starting in macOS 10.15 Catalina, Apple introduced Dark Mode. When Dark Mode is active you will see light text on a dark background.


Figure 497 A button in Light Mode (left) vs a button in Dark Mode (right)
By default Nisus Writer Pro will follow the appearance mode you have set in your “General” system preferences.

Figure 498 System Appearance preferences
Nisus Writer Pro also allows to you to work in Light Mode or Dark Mode independently from the rest of your Mac. For details on the available options see the section Appearance Preferences.
Quickly Switch Appearance Modes
You may want to change from Dark Mode to Light Mode (or vice versa) more rapidly than by reopening Nisus Writer’s preferences. You can also switch the active appearance mode via the menu View > Dark Mode.
| Previous Chapter Set “Defaults” for the Application |
<< index >> |
Next Chapter Menu Keys for Menu Commands |