You can import any normal image format including PDF, EPS, JPEG, and PNG images directly into Nisus Writer Pro.
☞ Mac PICT images may still be supported on your Mac, depending on your system version. However, PICT images are a dead technology and should be replaced as soon as possible.
It’s best to use the main menu to insert an image:
1. Place the insertion point in your text wherever you want the image to appear.
2. Use the menu Insert > Image > Insert Image…
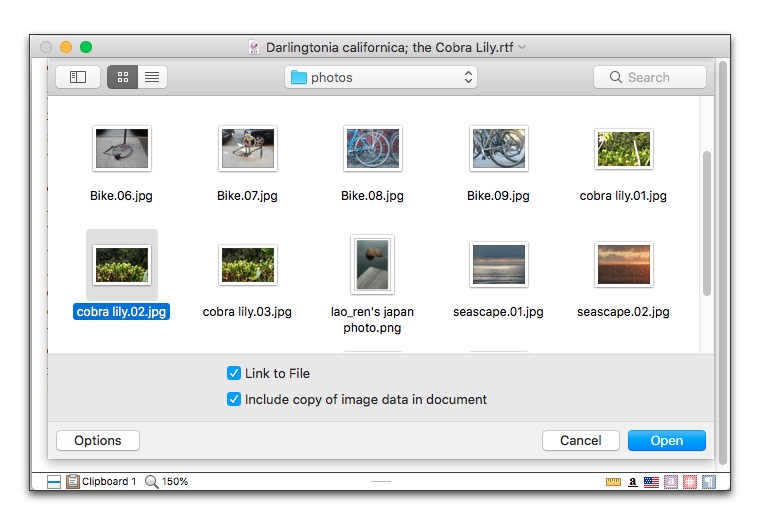
→ A standard file selection dialog appears as shown in Figure 180 below.
3. Locate and select the image file you want to insert.
4. Checkmark any desired Image Insertion Options as described below.
→ The image will be inserted.
Figure 180 Image Insertion dialog
The Image Insertion dialog (shown above) includes the following options:
Checkmark this option to link the inserted image back to its file on disk. If the original image file is edited externally, the image in your Nisus Writer document will be automatically updated.
To see an image’s linked file:
► Select the image and use the menu Insert > Image > Show Linked File in Finder. If an image is not linked, this menu will be disabled.
⚠️ One drawback of linked images is that if the original file is deleted or otherwise goes missing, the image will no longer display in your Nisus Writer document, unless you also checkmark the option to Include copy of image data in document.
Include copy of image in document
This option is only applicable to linked images. When enabled a full independent copy of the linked file’s data will be stored in your Nisus Writer document. This prevents linked images from disappearing, even if the original file no longer exists.
Images that are not linked will always include a full copy of the image data in your document.
When you insert an image into a document Nisus Writer preserves all of its original data and aspects like data format, file name, and size. This means that if you insert a very large image (in terms of its file size on disk) your document will grow in size accordingly.
⚠️ Be careful not to insert many large images or your document will also become very large! To see a list of the largest images in your document see the section “Image Analysis”.
Reducing the dimensions of the image on screen (eg: from 5 inches to 2 inches) does not reduce the space used by the image. You can only reduce the storage space an image requires by resizing it outside of Nisus Writer, eg: using Apple’s Preview app.
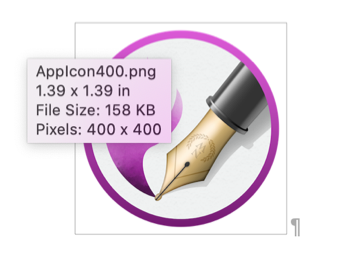
Figure 181 An inserted image and its metadata displayed in a tooltip
You can quickly paste an image from an external source:
1. Select the image in another application and choose the menu command: Edit > Copy.
2. Switch to your Nisus Writer Pro document and choose the menu command: Edit > Paste.
⚠️ When you paste an image the clipboard can change the nature of the graphic. Your image may be filtered by the source, or even by macOS itself. This may result in an unexpected image data format, file size, or level of fidelity. You may want to verify that a pasted image has maintained any properties you consider important, or simply Insert an image using the menu.
One situation where copy-pasting images is desirable is when working with LinkBack images. These specially linked images embed additional data to enhance their behavior. See the section “Use LinkBack” to learn about linking and editing an image using its original application.
You can also insert an image using drag-drop:
1. Select an image in an external source, eg: an image file in the Finder, a photo shown in Apple’s Photos app, etc.
2. Start dragging the image.
3. Drop the image into your Nisus Writer document.
⚠️ When you drag an image it can change the nature of the graphic. Your image may be filtered by the source, or even by macOS itself. This may result in an unexpected image data format, file size, or level of fidelity. You may want to verify that a dragged image has maintained any properties you consider important, or simply Insert an image using the menu.
PDFs are different than other images because they may contain multiple pages, and can also contain a mix of images and proper text. Nisus Writer Pro can help you import PDFs in a variety of ways.
Whenever you import a PDF, using any of the methods described in the section “Insert an image”, you will be presented with the PDF insertion dialog:
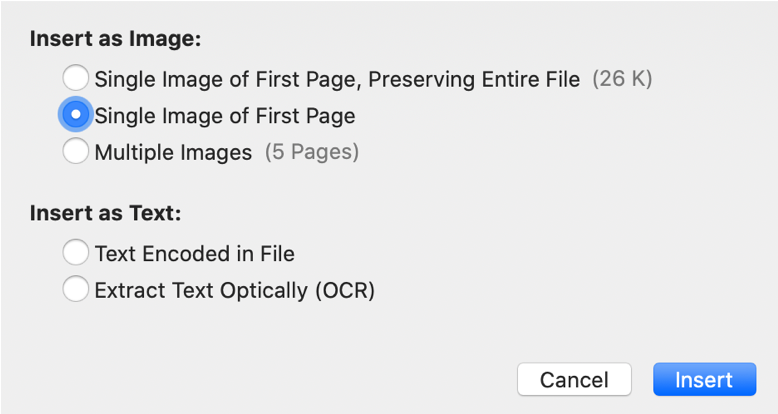
Figure 182 The PDF Insertion dialog.
The PDF insertion options shown in Figure 182 above behave as follows:
Single Image of First Page, Preserving Entire File
The first page of the PDF is inserted as a single image, but all of the original PDF file data is embedded in your document. In this way the full original PDF can still be accessed; see the section “Export an Image”.
The first page of the PDF is inserted as a single image. Any other pages in the PDF are ignored.
If the inserted PDF was originally produced using textual content (eg: editing and exporting a Nisus Writer document) the text saved in the file can be loaded and inserted as proper editable text.
The fidelity of the inserted text and formatting can vary, depending on how the PDF was originally produced and also what version of macOS you are using. The PDF data format concerns itself primarily with visual accuracy, not necessarily with preserving text, so the fidelity may be disappointing.
No matter how a PDF was originally created, Nisus Writer may be able to use optical character recognition (OCR) to detect and extract text. Use this insertion option to ignore any text encoded in the PDF and instead attempt an optical scan.
For more on this capability see the section “Extract Text from an Image (OCR)”.
| Previous Chapter Work with Various Types of Graphics |
<< index >> |
Next Chapter Export an Image |