.png)
View and review tracked changes
► Choose (check, turn on) the menu Tools > Track Changes > Show Changes.
This opens the Tracked Changes sidebar. Unless you have changed the Tracking and Display Options this command also checks (turns on) Show Change Highlighting in Text. so that the display of your tracked changes appears as illustrated in Figure 462.
Hide and show only the Track Changes sidebar
You may want to work with the Tracked Changes sidebar closed, but with some indicator that your document has changes. You can close the sidebar and retain the highlighted selection of changed text.
► Choose…
▷ (uncheck, turn off) the menu command: Tools > Track Changes > Show Changes Sidebar or
▷ “…” (Ellipsis, or Options menu) at the top of the Track Changes sidebar to close the Track Changes sidebar and leave the highlight on.
► Choose…
▷ (check, turn on) the menu command: Tools > Track Changes > Show Changes Sidebar or
▷ “…” (Ellipsis, or Options menu) at the top of the Track Changes sidebar to open the Track Changes sidebar and leave the highlight on.
☞ When the Track Changes sidebar is closed without turning off Track Changes, choosing Track Changes turns on and off the highlight of changed text in the document.
Hide and show only the highlighted changes in the text
You may want to work with the Tracked Changes sidebar open, and have a peripheral awareness that a particular paragraph has one or more change, but not see the highlight of changed text in the document. You can leave the sidebar open and turn off the highlighted selection of changed text.
► Choose…
▷ (uncheck, turn off) the menu command: Tools > Track Changes > Highlight Changes in Text or
▷ “…” (Ellipsis, or Options menu) at the top of the Track Changes sidebar to turn off the highlight display.
► Choose
▷ (check, turn on) the menu command: Tools > Track Changes > Highlight Changes in Text or
▷ “…” (Ellipsis, or Options menu) at the top of the Track Changes sidebar to turn on the highlight display.
▪︎ When the Tracked Changes sidebar is closed Highlight Changes in Text turns on and off the highlight of changed text in the document.
▪︎ When the Tracked Changes sidebar is open, Highlight Changes in Text does not affect the Changes sidebar.
Additional controls for the display of tracked changes
You can decide which changes deserve your attention.
► Choose the menu command: Tools > Track Changes > Track Change Options… to open a dialog that offers additional commands as well as those that appear on the Track Changes submenu. This dialog is illustrated in Figure 463.
Figure 463
The Track Changes Options window
☞ These options are saved on a per-document basis.
Determine the kinds of changes Nisus Writer Pro tracks
► In the Change Tracking section at the top of the dialog decide what kinds of changes should be tracked in the document.
Turn on or off:
• Track text insertions and deletions
• Track changes made to styles, eg: in the Style Sheet
These controls have no effect on the display of what changes have already been made, only what kinds of changes will actually be tracked.
Display options - Tracked Changes
Determine which author’s changes display
• In the Display Options section, decide whose changes should be displayed in the document. If many people have read and made changes to a document it can become busy with changes even with the comments turned off, as illustrated in Figure 465.
In the imaginary situation where Anna Sewell had sent her text to her publisher, the primary editor left the manuscript on the office server overnight. Two other readers could not control themselves and their edits were tracked by Nisus Writer Pro. When the text finally returned to Anna, her “editors” had all made their changes. She could hardly recognize her novel. One had made changes to formatting, which was not serious if she was considering publishing an EPUB version. Nisus Writer Pro could help her with that as explained in the section “Export Files” on page 76. However, Anna was truly only interested in the textual changes. Jarrold’s changes had been tracked and were illustrated in Figure 462 on page 528. They are displayed in pink in Figure 465. Opting to examine the changes of the “editor” who made primarily textual changes, Anna chose to display only those changes, as illustrated in Figure 466 on page 533.
The other editors’ names appear below All Authors in the pop-up menu labeled Show changes made by in the Display options portion of the Track Changes Options dialog illustrated in Figure 464.
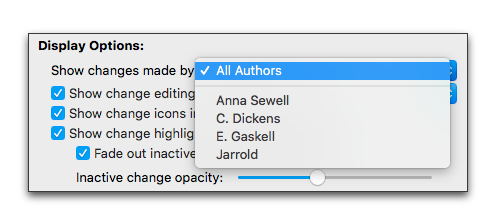
Figure 464
The Show Authors pop-up menu in the Track Changes Options window displaying the names of the authors
☞ Similar to the way Comment Display Options functions (as explained on page 508), if you change the display to show a particular author, Nisus Writer Pro automatically switches to show the edits by that author only.
When you switch back to show All Authors, Nisus Writer Pro shows all the edits.
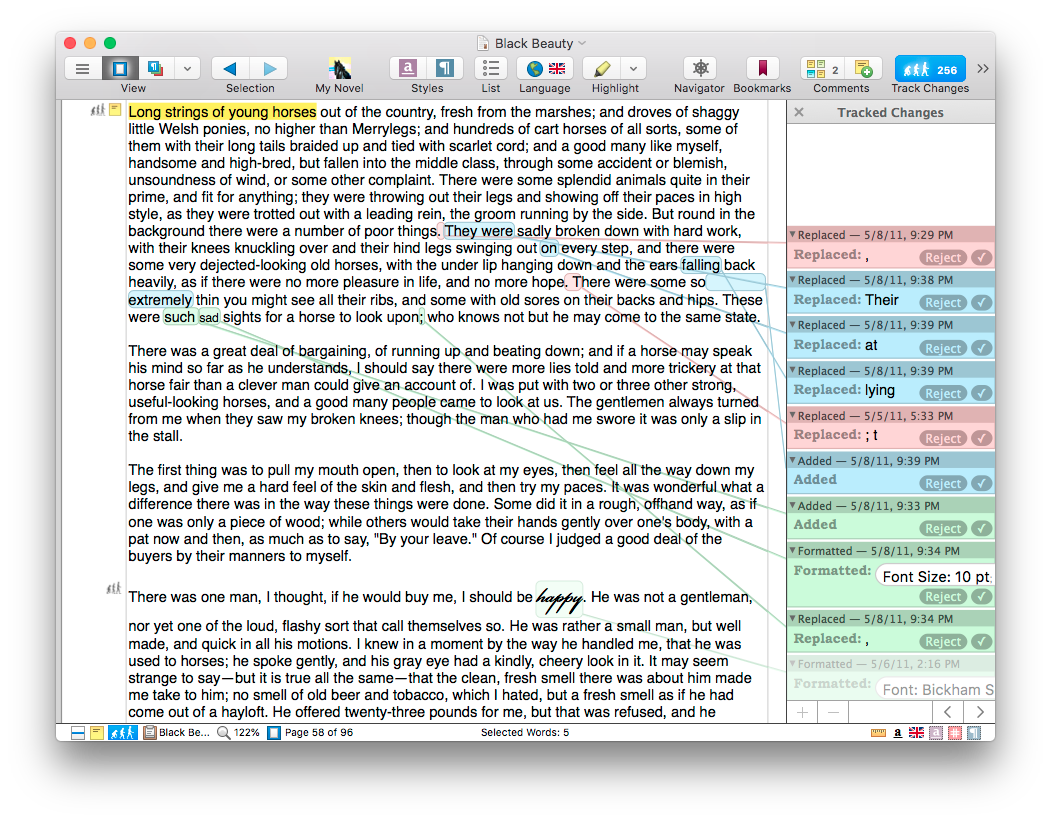
Figure 465
Black Beauty after having been edited by too many people
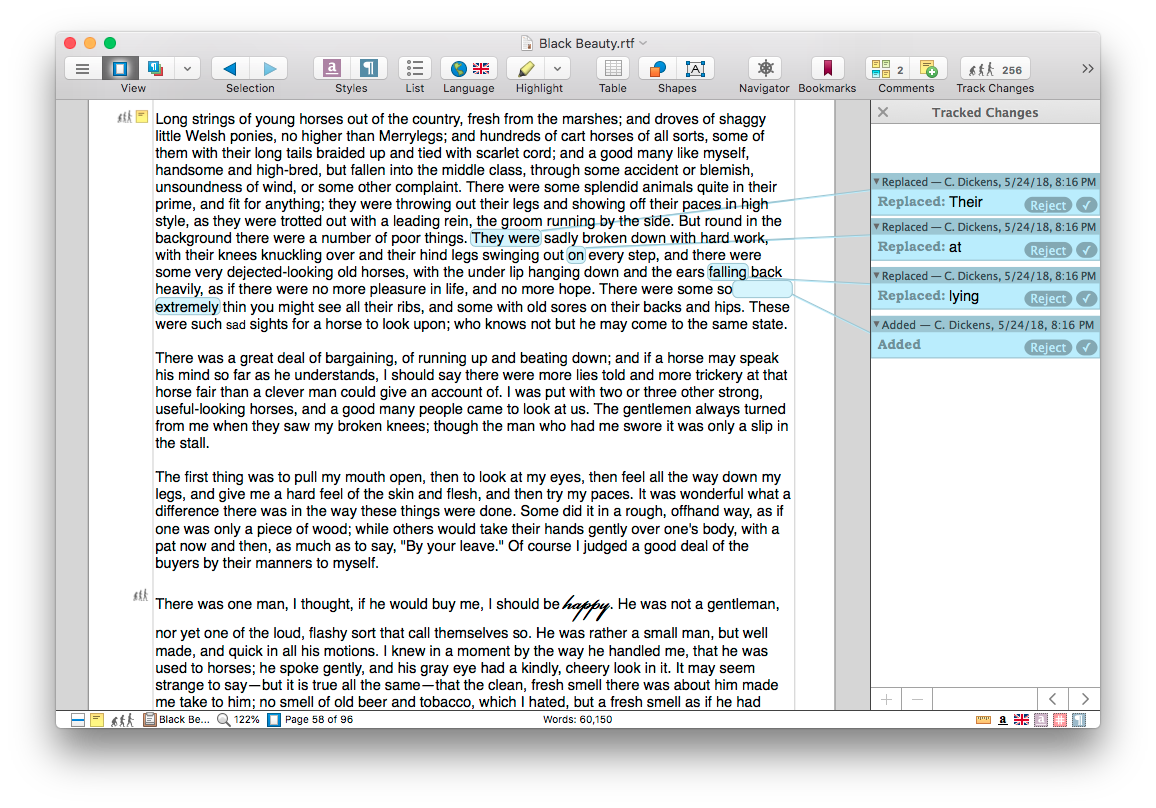
Figure 466
Black Beauty displaying the changes of only one editor
Sidebar - with tracked changes
As explained elsewhere (“Tracked Changes” on page 361, “Main Text with Tracked Changes” on page 370, and “The Track Changes Sidebar” on page 522), you can have your tracked changes appear in a Tracked Changes sidebar or split view. If you use the sidebar you have a few options unique to the sidebar.
Decide whether or not your tracked changes should reposition themselves so that those changes related to a particular paragraph float near it when the insertion point is present.
► Check (turn on) Reposition changes in the sidebar while working to have the tracked changes “float”.
► Uncheck (turn off) Reposition changes in the sidebar while working to have the tracked changes maintain a static position relative to the text.
• Decide whether to show the Tracked Changes sidebar on the Left or Right.
• Determine how much and which information appears in the Tracked Changes windoid’s title bar.
► From the Title Bars show pop-up menu choose either:
Split View - with tracked changes
As explained elsewhere (“Tracked Changes” on page 361, “Main Text with Tracked Changes” on page 370, and “The Track Changes Sidebar” on page 522), you can have your tracked changes appear in a Tracked Changes sidebar or split view. If you use the sidebar you have a few options unique to the sidebar.
• Decide whether or not your inactive tracked changes should be completely hidden (as opposed to fading in and out as with the sidebar). Those tracked changes related to any paragraph that is not the paragraph with the insertion point or a selection should not be visible.
► Check (turn on) Hide Inactive Tracked Changes to have the tracked changes “disappear”.
► Uncheck (turn off) Hide Inactive Tracked Changes to have the tracked changes visible whether they are near the currently selected paragraph or not.
• Determine how much and which information appears in the Comment’s title bar.
► From the Title Bars show pop-up menu choose either:
► Check (turn on) Title Bar includes marked text to have the bar that separates one tracked change from the next display the selected text to which the tracked change applies.
► Uncheck (turn off) Title Bar includes marked text to prevent the bar that separates one tracked change from the next displaying the selected text to which the tracked change applies.
Print and PDF with tracked changes
You can print the tracked change in your document for offline reading on paper.
☞ The tracked changes of all authors appear in the printed version, whether or not they are displayed on screen
► Check (turn on) Include changes when making a printout or PDF.
Nisus Writer Pro reduces the size of the main text to approximately 75% of its original size to make room for the tracked changes to print along the right side of the page as illustrated in Figure 471. This percent can vary a bit depending on the left and/or right margins of the main text. Nisus Writer Pro will eliminate the margins when printing tracked changes and instead allocate the whitespace to the annotations.
☞ If you leave this option turned off in the Track Changes Options window, you can always turn it on in the Print dialog, and vice versa.
To help identify which tracked changes are associated with specific selections in the main text, Nisus Writer Pro prints a line from the tracked change windoid to that text as illustrated in Figure 467.
%20changes%20of%20Black%20Beauty%20showing%20lines%20to%20changed%20text%20and%20number.png)
Figure 467
The printed (PDF) changes of Black Beauty showing lines to changed text and number
Nisus Writer Pro can also print a tiny number corresponding to the tracked change subscripted beneath the text, as illustrated in Figure 468.
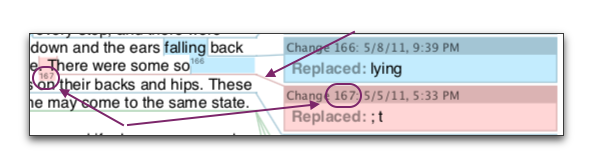
Figure 468
The printed (PDF) showing the changed text with its change number (subscripted) the change number in the tracked change windoid and the line connecting the two
► Check (turn on) Show change numbers by marked document text.
You may have many tracked changes associated with a small amount of text on any particular page… so many that there is not enough room on that page to print all the tracked changes. In that case, Nisus Writer Pro abridges the text of the tracked changes and prints its full text in an “Annotation Annex” on pages following the main text (and notes) of the document.
A button with an ellipsis and an arrow in the lower right corner of the Tracked Changes windoid, as illustrated in Figure 469, indicates on what page of the Annotation Annex the full text of the comment appears.
► When reading the PDF on your computer, click the button to display the appropriate page with the tracked change’s text.
► Click the tracked change’s title bar in the Annotation Annex as illustrated in Figure 470 to return to the location of the tracked change in the document.
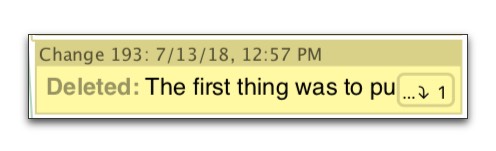
Figure 469
An abridged tracked change showing it’s Annotation Annex button
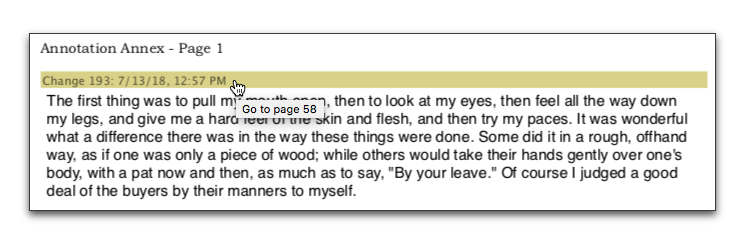
Figure 470
Tracked Change 193 as it appears in the Annotation Annex
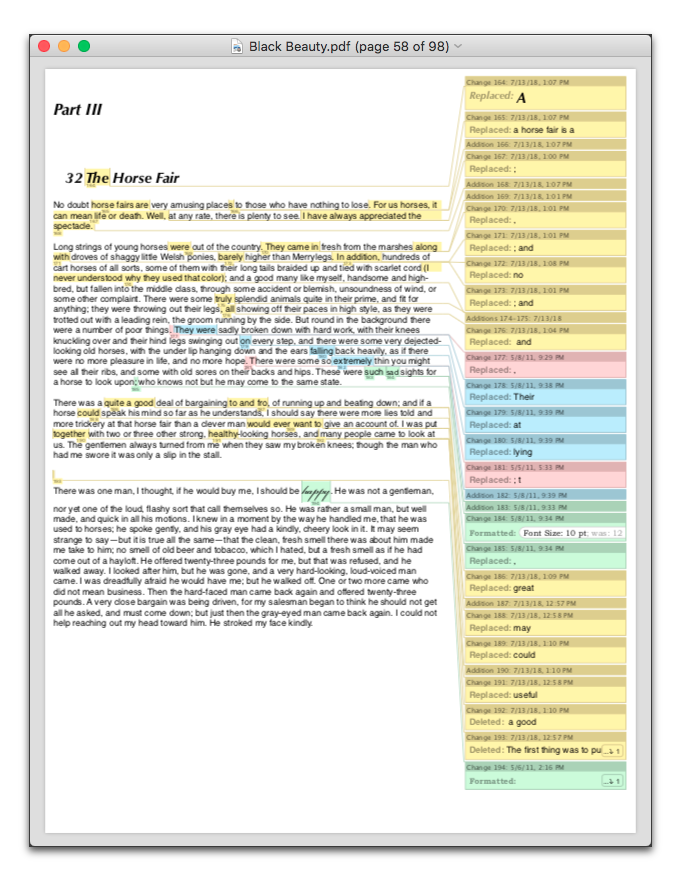
Figure 471
Black Beauty with multiple tracked changes printed as a PDF
Select the next or previous change
If you keep the Tracked Changes sidebar open you can see the changes in the sidebar (and highlighted in the document) as you scan your text. However, if you have a long document it is easier to jump directly to the changes.
► from the menu: Tools > Track Changes choose Select Next Change or Select Previous Change.
Collapse or expand the change annotations
If your document has many changes in it and you only want to view particular ones, you can collapse or expand any one you want.
► Click the title bar of any change annotation.
| Previous Chapter Start tracking changes |
<< index >> |
Next Chapter Accept or reject changes made |